I'm moving out. Done with 'the wild rumpus.' I needed change. There are reasons and I'll explain them sooner. For now, keep up with me at http://www.littleme-biggod.blogspot.com/. It will be worth it. I promise.
Don't forget to re-follow me, or follow me for the first time, as soon as you get there.
Catch you on the flip side. Hope you like it!
Thursday, February 17, 2011
Tuesday, February 15, 2011
first bug
Waylon has had his first stomach bug today. I don't know how or why I am still awake and feel the need to blog about this at this hour (9 pm), but here it is. It has been rough. Goodness.
Once this morning in the kitchen, once at Grandpa and Mae Mae's house, twice in Target, once in the car, once this evening in the kitchen (thank goodness Daddy was there to catch that one). Followed by two blowouts. Topped off with two baths and all the Pedialyte/Gatorade/water the little guy could hold. Man passed out soon as he hit the sheets. Some serious praying has been/is taking place.
All the while, my guy has been amazing (my little guy, I mean, though Joey has been pretty great himself - laundry, blowouts, dinner clean-up, the whole thing). Still laughing, dancing, playing, loving.
It has been a day.
Good night.
Thursday, February 10, 2011
how tu-tu
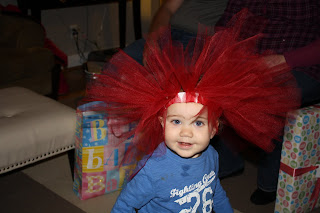 Seriously easy project. My neighbor-friend is having a baby girl later this month. I wanted to complete an outfit we've given her with a bright red tutu. Who knew these things are so pricey? So I made one myself. This is the best picture I have of the finished product so far. I'll share a better one ASAP.
 You are looking at everything you need, plus at least an hour. The complete tool list is: a spool of tulle, some elastic banding, needle and thread and scissors. *(I think the next time I do this, I might just buy some bottoms in the size/color of the tutu I'm making, cut the elastic band off and call it real.)
 And for your crafting enjoyment, a step-by-step.
1. Cut the elastic banding to your desired size (or cut it off the cheap-o bottoms) and sew the ends together nice and tight. Obviously, if you just cut the band off some bottoms, don't cut through the band - as in, don't cut the circle.
2. Cut the tulle in strips that are about 14-16 inches long. I couldn't tell you how many strips this took. Start with twenty and go.
3. Tie the tulle onto the elastic band, one strip at a time, and pull all the knots to the same side. For example, as I tied a knot, I pulled it to what would be "down" the tutu, or towards the bottom. Makes sense, right? I doubled knotted mine. Just in case.
And you're done. Presto! A tutu! So easy.
If you're not craft-prone and you really really want/need a tutu, let me know! I would love to make you one and would ask much less than retailers.
Etsy anyone?
In the meantime, how handsome is this little man??

home
Oh my goodness! I am so thrilled that y'all are interested! Thank you!
Consider this your first introduction into my Home. It has recently taken a feminine turn. Previous to mid-January, Home was dark - olive green, burnt orange, brown, black. All of a sudden, I am girly and I want my home to be girly with me. Enter make-over madness. Out with the dark, in with the light. I want brighter, softer colors, more flowers, more curves, and shiny things. It's in the works. I'll show you where I need inspiration. Maybe you can point me in the right, or any direction.


 I wanted you to get a better look at the curtains. This was the greatest (and easiest) idea from a good friend of mine. It's a drop-cloth. Yep. Found one that would cut into four panels that fit my windows, laid it out, cut it, clipped it to the rings on the rods (that I hung myself. eh-hem.) and wa-la! Insta-curtains. These came out to about $10 or $15 a window, minus the rods and rings.
 This is a closer view of the pictures that hang to the right of the windows. Made 'em myself (which is not hard to believe, I know) - a little craft paper, come alphabet stamps, black ink and a sharpie. Before these DIYs, the frames held pages from an Picasso art book. That is a great way to bring some high-class, easy art to your walls, and it doesn't take any talent. (You can buy jumbo-sized art books at any bookstore for about ten bucks.)
 Joey and I whipped up this chalkboard with a piece of plywood and a couple coats of chalkboard paint. I change the quote often, of course.
 Ok, need for inspiration number one. This is, clearly, the TV wall. That's all there is to it. Now, eventually Joey will make me a console to go under the TV that fits it a little better. He is already working on plans for a big wooden frame to fit the TV. But for now, this is what we've got. The whole setup is not centered on the wall. The TV is mounted, so we can't exactly move it to center. This leaves lots of wall above and to the left of the TV. What in the world do I do here? I am in the process of making some small pillows from leftover ottoman fabric to go in the stools.
 This is the mantel for now. The antlers will go as soon as spring hits. And the mirror frame is an upcoming project. I haven't decided what kind of transformation it will undergo, but it will look very different in the end. Any ideas? If this were our home, one of the first things I would overhaul would be this fireplace - new, reclaimed wood mantel, painted brick, the whole nine. The "painting" in this picture is also done by yours. It's some left-over paint I mixed up and spread around unevenly. Joey and I think it's waiting for something, but we don't know what.
 This is the kitchen table. For now. It will soon be refinished and not in need of a tablecloth. In the background is one of the unconventional baby gates J whipped up pre-Waylon.
 This is our master bedroom and the amazing headboard and bed frame my uber-talented husband made me. I found the same bed in a catalogue for almost $3,000. Two-hundred bucks later, it's mine! I am itching to upholster it in the next month or so. The ottoman was easy enough. I figure this will be an even easier job. Notice the same drop-cloth "curtains" in the bedroom. These came to about $5 a panel, I think.
Consider this your first introduction into my Home. It has recently taken a feminine turn. Previous to mid-January, Home was dark - olive green, burnt orange, brown, black. All of a sudden, I am girly and I want my home to be girly with me. Enter make-over madness. Out with the dark, in with the light. I want brighter, softer colors, more flowers, more curves, and shiny things. It's in the works. I'll show you where I need inspiration. Maybe you can point me in the right, or any direction.
This is an almost-complete view of the living room, from the kitchen in. I have been in the market for new pillows for at least two months now. I have found plenty that I love, but I'm so cheap I won't buy them. As soon as I learn how to sew a straight line on our machine (which happens to be the tall brown table in the corner - it's an antique from my grandmother!) I will just make my own.
I wanted you to get a better look at the curtains. This was the greatest (and easiest) idea from a good friend of mine. It's a drop-cloth. Yep. Found one that would cut into four panels that fit my windows, laid it out, cut it, clipped it to the rings on the rods (that I hung myself. eh-hem.) and wa-la! Insta-curtains. These came out to about $10 or $15 a window, minus the rods and rings.This is a closer view of the pictures that hang to the right of the windows. Made 'em myself (which is not hard to believe, I know) - a little craft paper, come alphabet stamps, black ink and a sharpie. Before these DIYs, the frames held pages from an Picasso art book. That is a great way to bring some high-class, easy art to your walls, and it doesn't take any talent. (You can buy jumbo-sized art books at any bookstore for about ten bucks.)This is the ottoman that Joey and I recently recovered. It was this awful, cheap fake leather that was peeling off on all sides. We used outdoor (read Waylon-proof) fabric and upholstery tacks. Put a couple of late nights in the shop and ended up with a pretty awesome re-make.
Joey and I whipped up this chalkboard with a piece of plywood and a couple coats of chalkboard paint. I change the quote often, of course.Ok, need for inspiration number one. This is, clearly, the TV wall. That's all there is to it. Now, eventually Joey will make me a console to go under the TV that fits it a little better. He is already working on plans for a big wooden frame to fit the TV. But for now, this is what we've got. The whole setup is not centered on the wall. The TV is mounted, so we can't exactly move it to center. This leaves lots of wall above and to the left of the TV. What in the world do I do here? I am in the process of making some small pillows from leftover ottoman fabric to go in the stools.This is the mantel for now. The antlers will go as soon as spring hits. And the mirror frame is an upcoming project. I haven't decided what kind of transformation it will undergo, but it will look very different in the end. Any ideas? If this were our home, one of the first things I would overhaul would be this fireplace - new, reclaimed wood mantel, painted brick, the whole nine. The "painting" in this picture is also done by yours. It's some left-over paint I mixed up and spread around unevenly. Joey and I think it's waiting for something, but we don't know what. This is the kitchen table. For now. It will soon be refinished and not in need of a tablecloth. In the background is one of the unconventional baby gates J whipped up pre-Waylon.
 This is our master bedroom and the amazing headboard and bed frame my uber-talented husband made me. I found the same bed in a catalogue for almost $3,000. Two-hundred bucks later, it's mine! I am itching to upholster it in the next month or so. The ottoman was easy enough. I figure this will be an even easier job. Notice the same drop-cloth "curtains" in the bedroom. These came to about $5 a panel, I think.
 Now that you've had the preliminary tour, let me boast a moment. Joey and I have only ever bought one small piece of furniture. That's right. That crapola fake leather ottoman is the only thing we've ever purchased. EVERY other piece of furniture you see in these pictures (and all the pieces you don't see) have been given to us or made with Joey's own two hands.
Also, I only chose the greige wall color you see in the living room. The greens were pre-existing. Lesson learned over the last two years: wherever we end up next will have all light walls. Not white, but a much lighter greige.
I will keep posting new pictures as I progress in my transformation, or as I change my mind for the hundredth time. Also, I love Waylon's room and will share that with you probably next week.
Tuesday, February 8, 2011
what you don't know
I just decided this afternoon that it's time to take this blog to the next level, or another level...maybe not necessarily up. What you may or may not know is that I love decorating and re-decorating and making and re-making things. I am a self-professed interior-design-aholic. You could say I am obsessed with it. As a matter of fact, there are days when that's all I can think about. I re-decorate my house at least once a month, sometimes more depending on the season and the success.
And I am a master copy-crafter. What happens is I see something I like/want, but being as I am as cheap as I am crafty, I most likely will refuse to spend what is wanted for said thing. So I figure out how to make it myself. It's not that I'm coming up with my own ideas. That happens from time to time, but more often than not, I'm just stealing other people's ideas and re-creating them at a much cheaper cost.
Since today is one of those days when I can think of little else than accessorizing my living room, I thought I would put this all out in the open and start posting before and afters, how-tos, how-not-tos, etc. I took several photos specifically for this introductory post and my battery died dead. Will share later.
Hope you're interested. Hope you enjoy.
Thursday, February 3, 2011
ten things
It's so funny. I started this post with the intention of making two lists - one of ten things I loved in high school that I don't now and the other of ten things I love now that I didn't in high school. I got to about four or five ( and those didn't come super easy) and I got stuck. Almost everything I could remember loving in high school, I pretty much still love now. Come to find out, I'm pretty much the same person. That's so weird to me.
And comforting. I'm still here! After all I've done and everywhere I've been and losing and regaining friends and standards (ech) and habits and opinions, I am the same ole Megan I have always been. Thank goodness.
I would upload a high school picture here, but I don't have one handy. Darn.
Oh, and really the only thing I could come up with is cow print. I loved cow print in high school, and not so much these days. Not that I ordered a cow hide rug about a year ago . . . then sent it back.
Subscribe to:
Posts (Atom)